Setup a Hugo based Blog on GitHub Pages
Hugo is a fast and flexible static site generator written in Go. It allows you to create and manage content easily, making it a popular choice for technical blogs and documentation sites. In this guide, I’ll show you how to set up a Hugo-based blog and deploy it to GitHub Pages, using the elegant Clarity theme. Whether you’re new to static site generators or looking to migrate from another platform, these steps will help you get started quickly.
Why Hugo?
- Speed: Hugo builds sites in milliseconds, even for large content bases.
- Simplicity: Content is written in Markdown, and configuration is straightforward.
- Flexibility: Hundreds of themes and easy customization.
- No vendor lock-in: Your content stays in plain files, versioned with Git.
Base Setup
Download and install Hugo CLI. Make sure you have Git installed as well.
Create the Hugo blog directory using Hugo CLI:
hugo new site integrations-blog
cd integrations-blog
git init
git submodule add https://github.com/chipzoller/hugo-clarity themes/clarity
echo theme = 'clarity' >> hugo.toml
hugo server
- The
hugo new sitecommand scaffolds a new Hugo project. - Adding the Clarity theme as a submodule keeps your theme up to date and separate from your content.
hugo serverstarts a local development server. Visithttp://localhost:1313to preview your site.
Add the first post:
hugo new posts/setup-hugo-blog.md
Edit the post in content/posts/setup-hugo-blog.md:
... add some content ...
Tip: Hugo uses front matter (the section between
+++or---) to store metadata like title, date, and tags. Adjust these as needed for each post.
Create a base menu in hugo.toml:
[menu]
  [[menu.main]]
    name = "Blog"
    url = "/posts/"
    weight = 1

  [[menu.main]]
    name = "Classes"
    url = "/classes/"
    weight = 2

  [[menu.main]]
    name = "Services"
    url = "https://www.integrations.at"
    weight = 3
- The menu configuration helps users navigate your site. Adjust names, URLs, and weights to fit your content structure.
Add padding to the code blocks in _syntax.scss:
code
...
    padding-left: 1rem
Tip: Customizing your theme’s CSS allows you to fine-tune the appearance of code blocks and other elements. Place your custom styles in
assets/css/custom.cssor the appropriate SCSS file for your theme.
Create a repo GITHUB_USERNAME/'URL.github.io ie alexander-kastil/integrations.github.io and update the base URL in hugo.toml:
baseURL = 'https://alexander-kastil.github.io/'
- The
baseURLshould match your GitHub Pages URL. This ensures all links and resources are generated correctly.
Rebuild the Hugo site:
hugo server -D
- The
-Dflag includes draft posts in your local preview.
Read through the deployment options, Change to folder public and commit the changes:
cd public
git init
git add .
git commit -m "Initial commit"
git remote add origin https://github.com/alexander-kastil/integrations.github.io.git
git push -u origin master
Note: The
publicfolder contains the generated static site. For manual deployment, you push this folder to your GitHub Pages repository. For automated deployment, see the next section.
Deployment
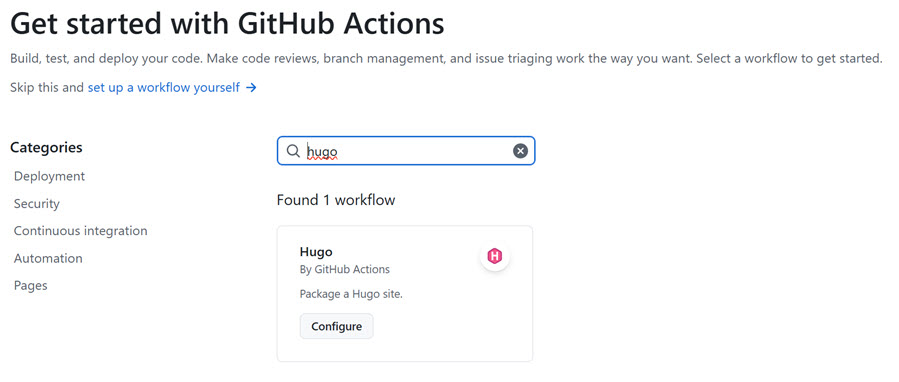
Next we will set up the GitHub Pages deployment. Go to the repository settings and enable GitHub Pages. Set the Build and Deployment source to GitHub Actions and search for the Hugo action. Select the latest version and add it to your repository. This will automatically build and deploy your Hugo site to GitHub Pages whenever you push changes to the main branch.
- Using GitHub Actions for deployment is recommended, as it automates the build and publish process. You can find sample workflows in the Hugo documentation.
- After setup, every push to your main branch will trigger a new deployment.
Custom Domain
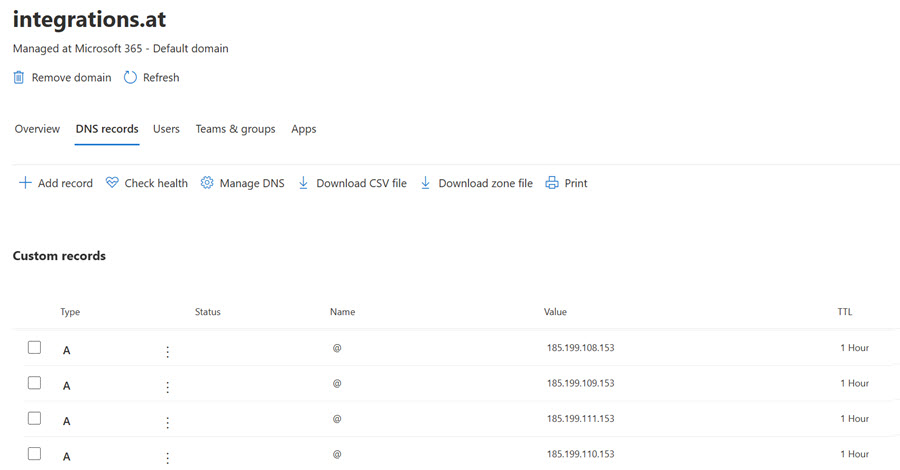
I am using Microsoft DNS to manage my custom domain. I created a CNAME record pointing to alexander-kastil.github.io and four a records pointing to the following IP addresses:
- 185.199.108.153
- 185.199.109.153
- 185.199.110.153
- 185.199.111.153
Update the following line in the hugo.toml file:
baseURL = 'https://blog.integrations.at/'
- This ensures your site generates links for your custom domain.
Last but not least, add the custom domain in the GitHub Pages settings and enforce HTTPS. This will ensure that your custom domain is properly configured and linked to your GitHub Pages site.
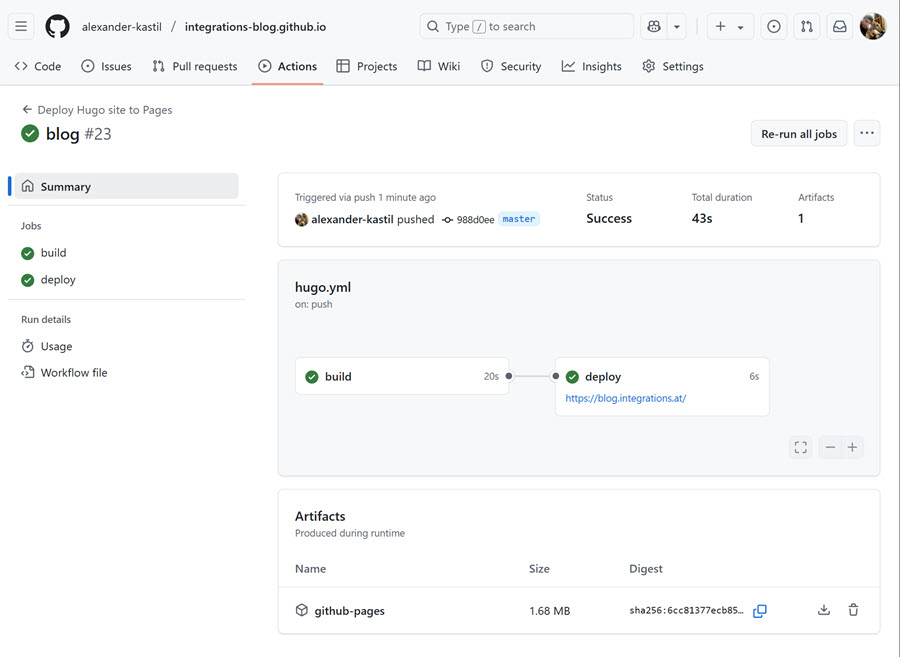
Now check the deployment status in the GitHub Actions tab. If everything is set up correctly, you should see a successful deployment message. You can also check the GitHub Pages settings to ensure that your custom domain is properly configured and linked to your GitHub Pages site.
Troubleshooting & Tips
- If you see a 404 error after deployment, double-check your
baseURLand DNS settings. - For theme updates, run
git submodule update --remote --mergein your project root. - Use Netlify or Vercel for alternative hosting options with continuous deployment.
- Explore Hugo’s official documentation for advanced features like taxonomies, shortcodes, and custom layouts.
Further Reading
Happy blogging! If you have questions or want to share your own Hugo setup tips, feel free to leave a comment or reach out.